Building My First Chrome Extension with AI
Years of working as a designer, my practice always go from sketching out product ideas, prototyping them in Figma or Arduino, to delivering to dev team to code it out. As an experiment with emerging AI tool, I gave myself this small personal challenge to see if I could go further to develop an MVP from scratch.
It’s a Chrome Extension called Swedish Sidekick, a little browser helper that lets me highlight Swedish words I don’t know, get instant explanations, and save them to my own flashcard deck on the cloud.
I made it all with the help of ChatGPT and Cursor, with a sprinkle of my own CSS and JS tweaks for better visual.
In this post, I’ll share how I went from idea to MVP, what worked, what didn’t, and what I learned along the way.
Why I wanted to build Swedish Sidekick
1. A tool tailored for my own learning style
I’m learning Swedish, and I struggled with how it was taught at language schools. My knowledge of Danish gives me a good foundation of reading and grammar, but I lack vocabularies. And I hate learning words by heart.
So I thought: what if I could highlight a word when reading something, get an explanation within relevant contexts, and add it to my own flashcard deck right away?
That’s the core idea for Swedish Sidekick, a simple, context-aware language companion for my everyday browsing.
2. A chance to prototype with AI
The second motivation was curiosity. I’ve been following how various AI tools are transforming product design, but I wanted to experience it first-hand for a long time, to try to use them as my developer teammates and maybe more?
It turned out, it was faster than I expected.
Built from scratch
Step 1: Use ChatGPT to plan and structure the task

I started by simply describing what I wanted in ChatGPT:
“I want to build a Chrome Extension that helps me highlight Swedish words on any webpage, explain them, and add them to my personal flashcard list.”
Within minutes, it outlined the structure:
manifest.jsonfor extension settingscontent.jsfor handling text selectionpopup.htmlfor the UIbackground.jsfor storing data
It even generated working code snippets for each file.
I followed its instructions step-by-step, asked follow-up questions whenever I got stuck, and iterated until the extension could appear in Chrome’s toolbar.
The first try didn’t give me fully what I wanted, but it’s a good start.

The starting point.
Didn’t add the word to the side bar.
UI and visuals are bare minimum.
LLM was not connected.
It’s not responsive.
And more…
Step 2: Debugging & Iterating in Cursor
Once I had my first working draft, I moved everything into Cursor.
Cursor is good at reading project files, tracking relationships between them, and fixing errors directly when I asked, and update the code in Github. I asked it how to tackle those issues by simply talking to it, for example:
“Why isn’t my popup showing up?”
“Which LLM to connect to for best context explaining? Is there API available?”
“Trigger this function after click. And make it responsive.”
It helped me find the missing pieces, rewrite functions, and explain why things broke.
Tips : Be specific.
By describing the request in the form of “do this, then that“, it broke down a task into tiny steps for me and reminded me what to look for in each step, which I found super helpful.
Nahhh : You have to tune the visuals by hand. Bit by bit. Be patient.
Describing design in words rarely translates into the right pixels. When I asked Cursor to “make the button look more in Nordic style” or “add more spacing to the layout,“ it just couldn’t do it well. That’s where visual tools like Figma or Lovable still win.

Step 3: Hand tweak visuals with CSS & JS
Once the core logic worked, I went back to design details, but in code.
I opened the CSS and JS files and started tweaking visual elements like:
Adjusting font sizes, corner radius and button spacing
Adding hover and clicked states
Aligning popup elements to feel more balanced
If you are like me, more of a visual-dominant person, this process might feel robotic and takes much more time to get it right compared to editing it visually in Figma or Lovable.
*EDIT: with latest “knowledge“ feature, you can import your existing design system into Cursor for more precise UI.

Step 4: Connecting to Google Drive & Google Docs
After the local flashcard feature worked, I wanted to save words to the cloud, for example, Google Drive or a Google Doc for future references. Letting users choose cloud storage made the extension genuinely useful across devices.
This step added a layer of complexity I hadn’t expected: authentication, consent screens, OAuth scopes, and privacy settings. I needed:
A Google Cloud project and OAuth client ID
A clear list of scopes (e.g., Drive file access, Docs editing) so users know what they’re allowing
A flow that opens Google’s consent screen, grants access, and returns a token the extension can use securely
Cursor helped along the way. I leaned on it to:
Generate the basic OAuth flow code and manifest permission updates
Explain how to set redirect URIs and configure the consent screen
Troubleshoot errors like mismatched redirect URIs or missing scopes

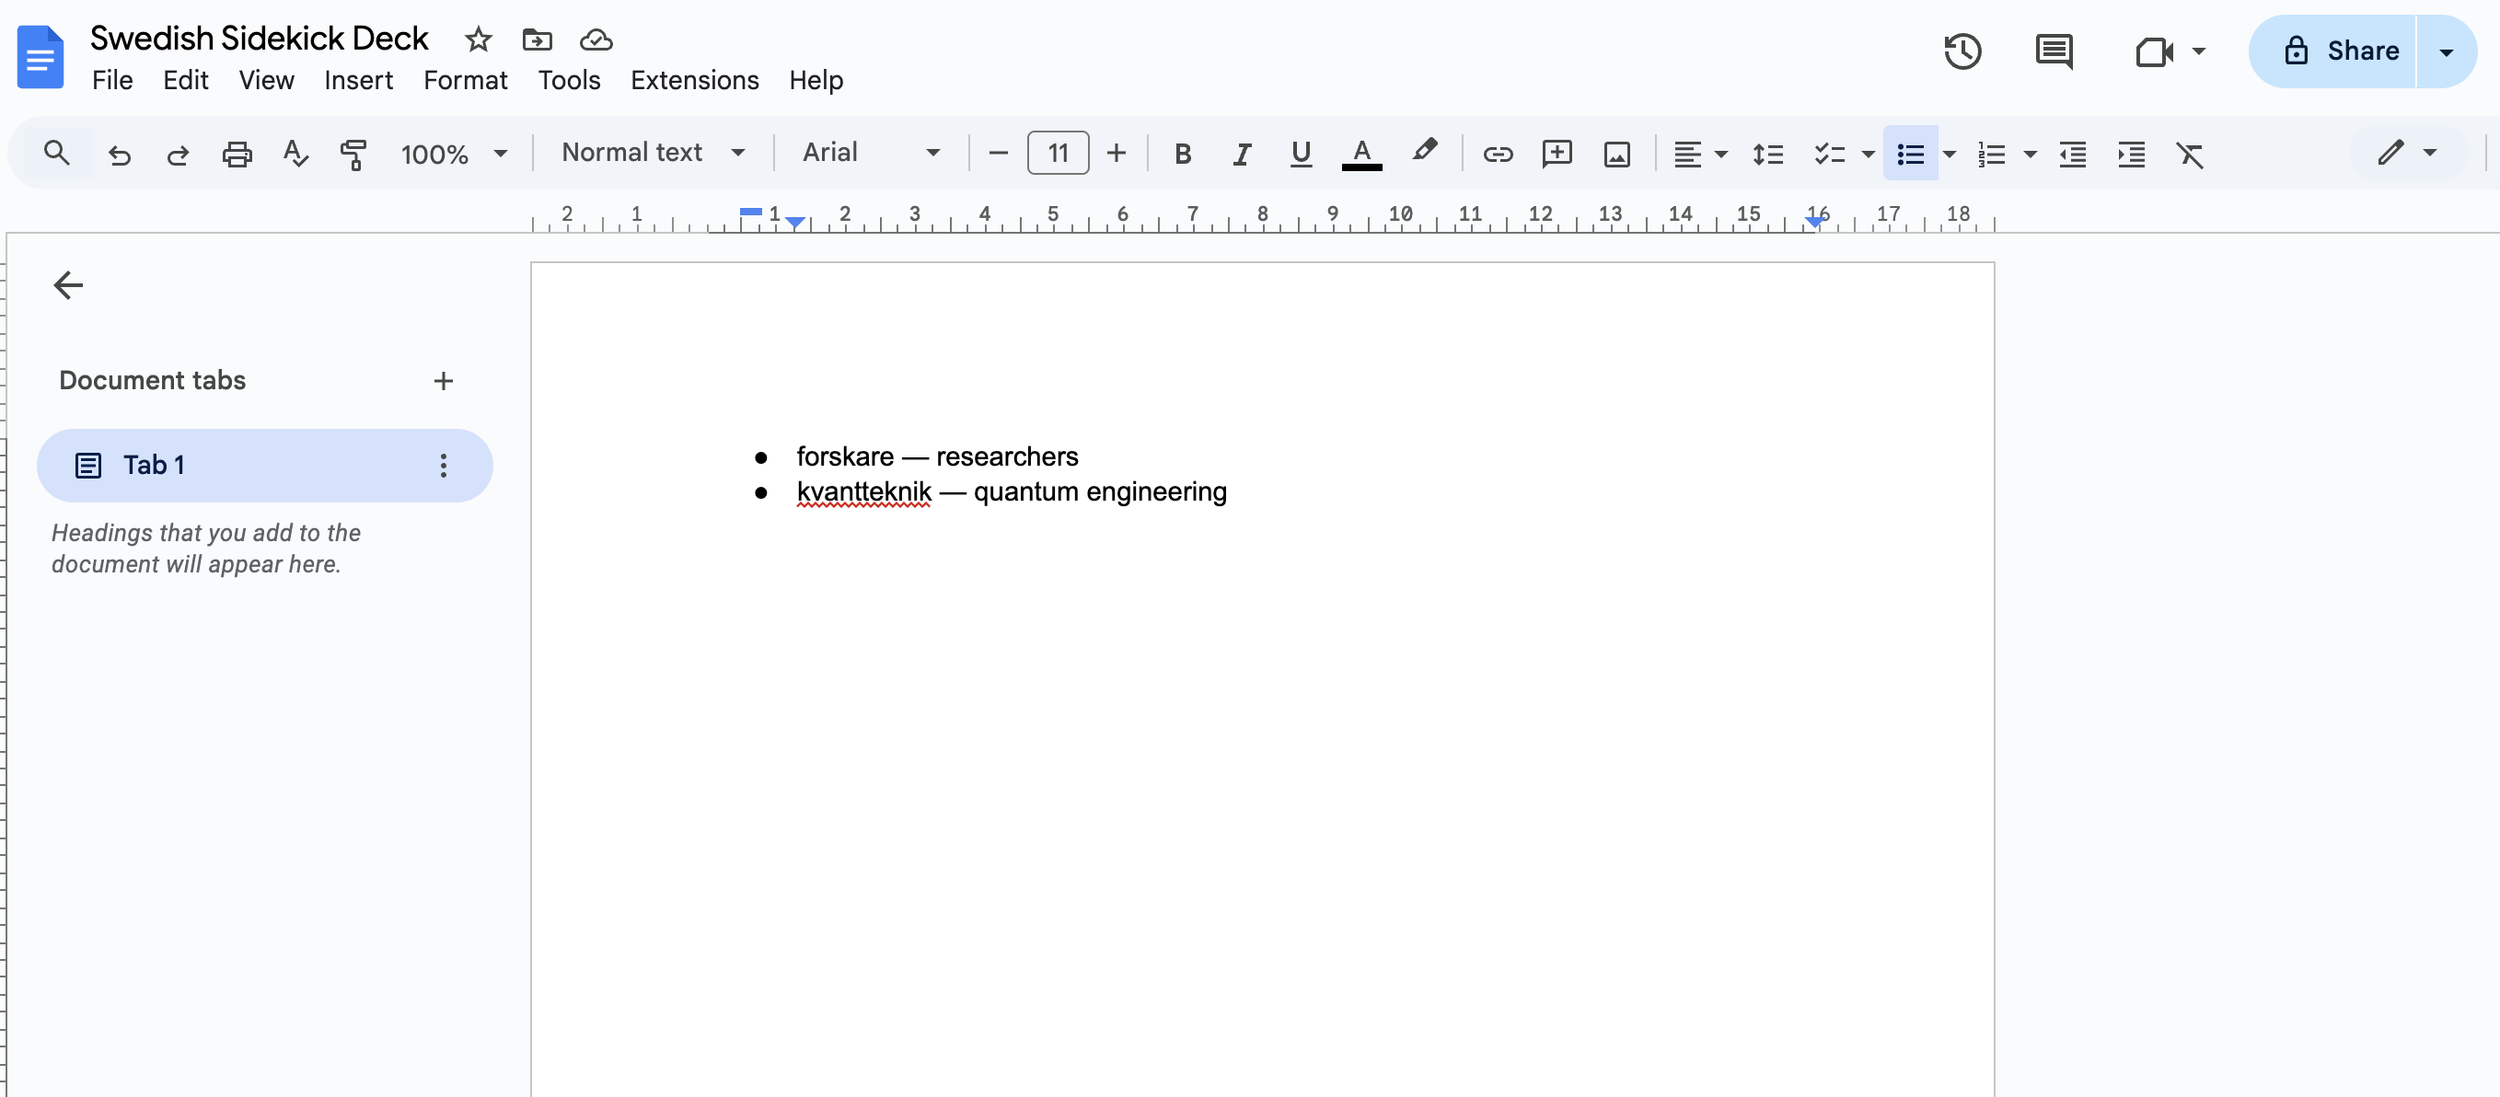
Selected words will shown in Google Doc
The outcome

👍 What was successful:
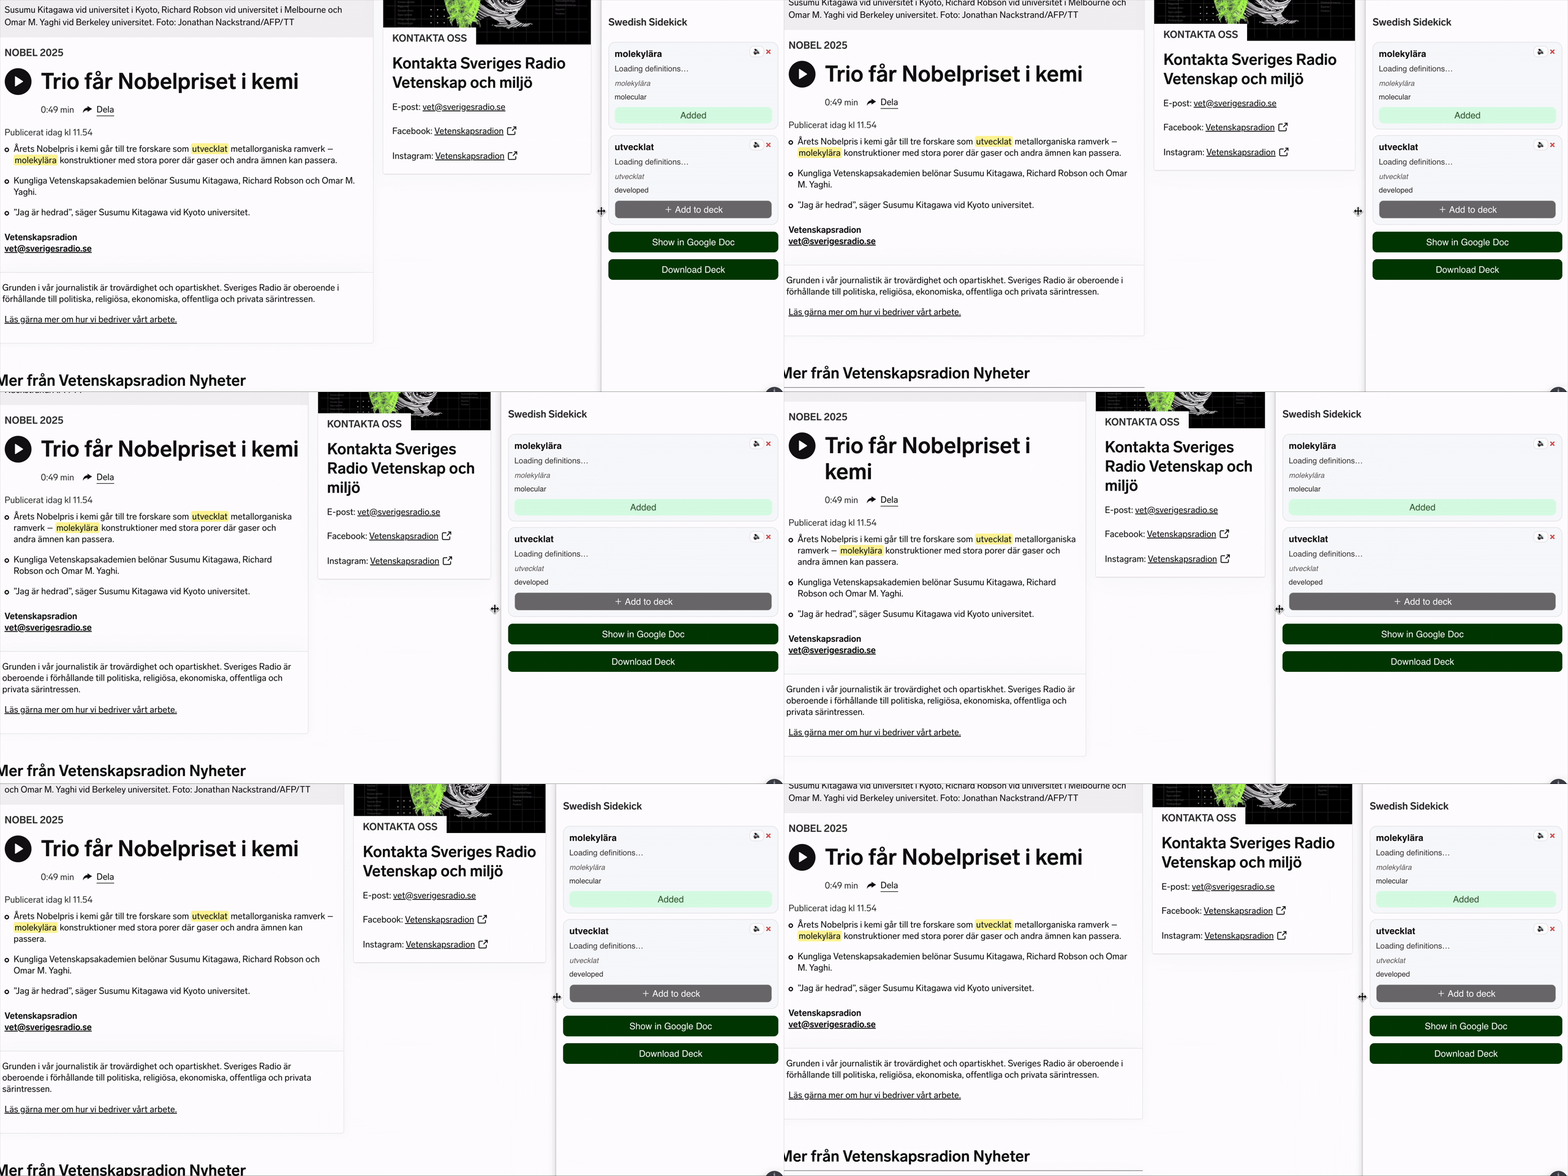
Highlighted words are marked also in the original context
Added button states: clicked, hover, default
Click the “speaker“ icon to listen to its pronunciation
User can remove the card from the sidebar
User can either download the deck as text file to open the deck in Google Doc
Responsive design
🤔 What was not successful:
Nice micro animations while interacted
LLM connection is not fully there, so it didn’t generate examples where and how the word can be used

Card added to Google Doc
User can choose to view it now or later

Added button states
Default. Hover. Clicked.
My takeaways
1. Start simple and stupid
Before building this Chrome extension, I had an ambition to create a full web-based app with setting up user accounts, a dashboard, memory card features and so on. It quickly became overwhelming.
So I stepped back, refocused on the core need: helping myself learn and retain new vocabulary within context. Once I narrowed the scope, everything became clearer. Clarifying priorities not only made the build easier, which also made the prototype possible.
2. AI is a fantastic help to build an MVP with
You don’t need to be a full engineer team to build something functional anymore. With clear prompts and intentions, you can ask AI to help you from idea to working prototype in days or even hours. It’s an incredibly empowering feeling.
3. Cursor bridges the Designer–Developer gap
Working with Cursor was really fun. The whole process was more like an interactive conversation, helped me understanding how code works and how it’s structured.
4. Make the workflow strategically
ChatGPT was great for concept and generating structure; Cursor was better for debugging and file-level reasoning. We as humans need to learn how to direct the tools with intention so they serve us better. Mixing tools makes the workflow smoother, but it’s worth paying attention to data privacy and availability (especially if your project connects to APIs or uses user data).
5. Not pixel-perfect (yet)
The final version of the MVP looks and feels good enough for personal use, but it’s far from a polished product. To achieve true visual finesse, you’d still want to dive deeper into CSS or explore connecting Figma to code directly. That’s something I want to test next.
What’s next
AI tools are starting to dissolve the boundaries between design and development. I can now go from idea to prototype to testable MVP almost entirely on my own. And that opens up an exciting space for designers to explore creative autonomy without worrying about their technical knowledge, and be brave to try any ideas. With that said, knowledge of coding definitely helped, even it’s basic.
Next, I want to test tighter Figma-to-code flows and see if I can sync design tokens and layouts directly into Cursor, maybe even transfer micro interactions from Figma. Also, more polished UX around cloud integrations (privacy-first defaults, clearer consent UI) is something I’ll iterate on.
Start small, describe what you want clearly, and let AI do the heavy lifting and guide you through. Break things. Fix them. Learn by doing.